
People who have celiac disease must avoid foods and beverages that contain gluten. Gluten occurs naturally in barley, wheat, and rye. Beer is usually a beverage that must be avoided by people with celiac disease, as it is almost always made from barley. Wheat beers are made from barley and wheat. However, gluten-free beer can be made relatively easily from sorghum syrup. Sorghum is a nutritious millet-like grain that is used in Africa to make traditional fermented beverages. There is even a Nigerian version of Guinness Stout that is made from sorghum. Redbridge sorghum beer, made by Anheuser Busch, is made from sorghum syrup. Brewing methods can be modified depending on the equipment that is available, so sorghum beer can be brewed in a kitchen or outside.
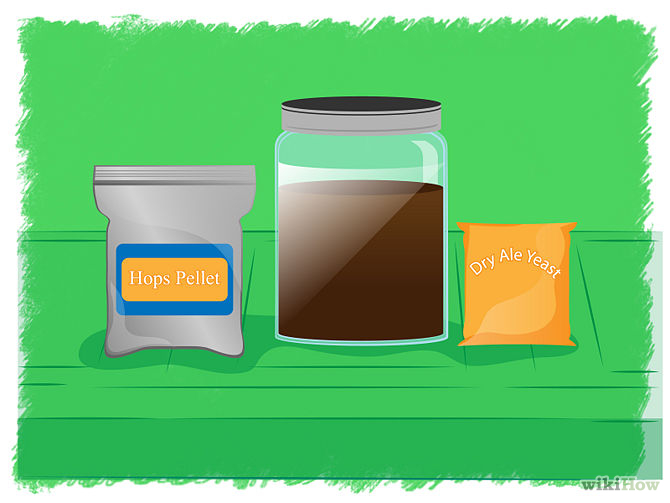
1. Gather the ingredients. For each 5 gallon batch, you will need about 6.5 to 7 pounds of sorghum syrup, about 1 to 2 ounces of hops, and 1 packet of gluten-free dried beer (ale) yeast. Additional gluten-free sources of fermentable sugars are often used, such as honey, rice syrup solids, fruit juice, and Belgian candy sugar. It is generally best to only add up to about 1 pound of additional fermentable sugars. This is because a very high sugar content requires special strains of yeast that can produce higher concentrations of alcohol, and more sugar means that the fermentation process will take longer.
Hops are available as small compressed pellets or as whole, dried “flowers”. Pellet hops are generally easier to use because whole hops will need to be strained out using a large sanitized strainer. Different hops will have different naturally-occurring quantities of bittering compounds called alpha acids. One ounce of hops with an alpha acid content of 4 percent will imbue beer with about the amount of bitterness that is found with regular Budweiser® when boiled for 60 minutes. Use more hops or hops with a higher alpha acid content to brew sorghum beer that is more bitter. Boiling for longer periods of time also results in greater levels of bitterness. Add additional hops at the very end of the boil, or just after the boil has ended, to imbue beer with more hop flavor and aroma without adding much or any bitterness.
2. Clean and sanitize the brewing equipment. It is especially important to sanitize equipment such as the carboy (the fermenting vessel) or a fermenting bucket that will come into contact with the beer after it has been boiled and cooled (as described in subsequent steps). Also sanitize an airlock and the proper rubber stopper that the airlock will be attached to when it is placed in the mouth of the carboy to create an air-tight seal. A hose or a funnel will be used to transfer the boiled, cooled sorghum mixture to the sanitized carboy. Such items must also be sanitized. Equipment such as the boil kettle that is heated for 20 minutes or longer does not need to be sanitized. Use iodophor sanitizer or another type of sanitizer, such as an acid-based sanitizer. Sanitizers are available at home brew stores.
- Soak equipment for 2 minutes in diluted iodophore sanitizer solution, then allow to air-dry soon before use. Add about one or two cap-fulls of concentrated iodophore to five gallons of water.

- Completely fill a 6 or 6.5 gallon carboy with diluted sanitizer solution. It may be necessary to attach a sanitized garden hose to the kitchen faucet to safely fill the carboy in a sanitary manner.

- Pour out the sanitizer, keeping it for re-use if desired. Invert the carboy using a carboy stand so that residual sanitizer can drain out of it.

 3. Prepare topping-off water if needed. If you are using a small boil kettle that has a capacity of less than 8.5 gallons, you will most likely need to add additional sterilized or sanitary bottled water to bring the final volume in the carboy fermenter to about 5.5 gallons. Pre-boil and cool the necessary amount of water, or use spring water. Do not use distilled water, as the yeast that will ferment the sorghum mixture need the minerals that are in non-distilled water.

- Allow for 20 percent evaporation during the boil. The actual amount of evaporation will vary. Use more water if the evaporation rate is high, and less water if it is low.
- A more dilute solution will more readily take on hop bitterness as the hops are boiled, so will be more cost-effective in terms of hops. However, more energy will be required to boil a dilute mixture. Larger containers are also more difficult to lift.
- Alternative method. Add 2 gallons of filtered spring water to a 3 gallon stainless steel stock pot. Bring to 155°F and add the sorghum, the flavoring hops, and 1/3 of the aromatic hops. Bring to a boil and hold there for 10 minutes. Add the rest of the aromatic hops and drop the heat to a simmer for 5 minutes. You now have a fully ready mash. Pour 2 gallons and one pint of filtered spring water, plus one bag of commercial ice, into a 5 gallon fermenter (That’s the white bucket you see in the later picture. It’s just an alternative method of the carboy.) Pour the mash into the water/ice mix in the fermenter. The temperature should now be near 80°. That’s perfect to pitch the yeast. You now have a wort. Cover, put the airlock in place, and put the fermenter in a cool, dark place for 10 – 14 days.

5. Add the sorghum syrup to the hot water.
- Also add additional fermentable sugars if desired.

6. Bring the mixture (also called the wort) to a boil.
The mixture may boil over at this point. Keep a close eye on it and turn off the heat (or remove from the heat source) if necessary to prevent a boil-over. Also stir to reduce the foam that will form.

 8. Continue boiling for 60 minutes. Maintain a full boil during the entire 60 minutes. During this time, the hops imbue the boiling mixture with the desired bitterness that is characteristic of beer. Use fewer hops or hops with a lower alpha acid content for less-bitter beer.
 - When using a small boil kettle that can be picked up easily, cool the kettle in an ice bath in a sink or large container. Simply mix ice with cold water, and place the pot in the ice bath, being careful to not splash hot liquid on yourself.

- When boiling larger amounts that cannot be picked up, use a wort chiller. If the wort chiller is the type that is submersed in the boil kettle, it should be placed in the boil kettle for 20 minutes while the mixture is still boiling in order to sterilize it.


10. Transfer the cooled mixture to the sanitized, drained carboy. This can be accomplished by simply pouring the cooled, boiled mixture through a large funnel into the carboy, or by using a siphon or, if the kettle has a spigot, a sanitized tight-fitting hose. Try to splash the cooled mixture as you transfer it, as this will cause it to pick up some air. The yeast that will be added requires oxygen to properly ferment the mixture. It is best to leave about 10 to 20 percent head space for the yeast foam (krausen) that will form when the mixture is actively fermenting. However, the krausen may not take up nearly as much volume or be as noticeable as the krausen that occurs with beer that is made from barley malt.
- Top off with cooled, boiled water or bottled water (if necessary) to bring the final volume to between 5 and 6 gallons.
- Add pasteurized fruit juice or whole, pasteurized canned fruit if desired. Fruit can also be added after the mixture has finished fermenting (see about fermentation below). When added after the beer has finished fermenting, more fruit flavor is retained. However, the fruit will cause a new fermentation, and must be left to ferment in the carboy for 1 to 3 weeks. Also keep in mind that since fruit juice is a concentrated source of fermentable sugars, adding too much fruit juice may cause the sugar content to be too high. The yeast may not be able to completely ferment the sugars into alcohol.

 12. Affix an airlock to the carboy. This ensures that air and bacteria will not enter the carboy and spoil the fermenting sorghum mixture. Be sure to fill the airlock with a liquid such as sanitary water, diluted sanitizer, or vodka. The liquid causes the airlock to become sealed from the bacteria-ridden outside air, but will allow the carbon dioxide that the fermenting yeast produces to escape. Never ferment beer in a vessel that cannot allow CO2 to escape, as it will explode.
  13. Ferment the beer. Allow the beer to ferment in a warm or room-temperature (not hot or cold), dark place until the airlock has completely stopped bubbling. The fermentation time will be about 1 week, depending on the sugar concentration and temperature. The freshly fermented beer can be given extra time, up to 3 weeks, to more completely ferment and age.
14. Bottle or keg the beer.
- To prepare for bottling or kegging, clean and sanitize all of the equipment that will come into contact with the beer, and prepare a boiled solution of dextrose bottling sugar (also referred to as priming sugar). The sugar will give the yeast that is living in the beer a small amount of fermentable sugar that will be converted by the yeast into carbon dioxide, plus a very small amount of alcohol. The carbon dioxide will cause the beer that is sealed in bottles or kegs to become carbonated.
- If bottling, prepare 1/2 to 3/4 cups of bottling sugar by mixing it with about 3 cups of water. Boil this solution for 20 minutes to sterilize it. Allow it to cool, then carefully pour or siphon the beer into a bottling bucket, trying not to splash it. Mix in the sugar solution with a large spoon. Attach a 4 or 5 foot length of 3/8″ I.D. vinyl tubing to the bucket’s spigot, and attach a bottling wand to the other end of the tubing.
- These buckets are made with lids to accommodate an airlock and a spigot that fits tubing for bottling. They are suitable for the whole fermenting process.
- Using the bottling wand, fill sanitized, air-dried beer bottles so that about 3/4 of an inch of air space is left in the neck of each bottle. The bottling wand will only release beer into the bottles when it is touched to the bottom or side of the bottles.
- Cap each bottle using a handheld or benchtop capper, and store the freshly filled and capped bottles in a dark, warm area for 2 to 3 weeks. During this time, they will carbonate naturally.
 15. If kegging the beer in a 5 gallon cornelius soda keg, prepare 1/3 to 1/2 cups of bottling sugar by mixing it with about 3 cups of water. Boil this solution for 20 minutes to sterilize it. Allow it to cool, then carefully pour or siphon the beer into the keg. Mix in the sugar solution. Seal the keg and pressurize to 10 PSI using compressed CO2 and a gas regulator. Allow the beer to carbonate in a warm area for 2 to 3 weeks. Kegs may also be carbonated more rapidly using a compressed carbon dioxide gas bottle. Serve using a kegerator or a hand pump.
Source: http://www.wikihow.com/Homebrew-Gluten-Free-Sorghum-Beer